


Stop Making a Mess — Here's Exactly How to Use a Water Flosser the Right Way
Okay, so here's the thing — the very first time most people use a water flosser, they turn it on before the tip is in their mouth. Water goes everywhere—mirror, counter, shirt, all of it.
That's basically the entire learning curve.
Once past that one mistake, these things are genuinely easy to use. Give it two or three sessions, and it stops feeling like a gadget and just becomes part of getting ready. Especially worth it if you've got braces, implants, crowns, or bridges — honestly, if flossing with string is a frustrating nightly event for you, this changes that. Worth folding into your smart oral hygiene regardless. Below are the full how-to, what trips people up, the before-and-after brushing debate, and how to keep the device from getting gross over time.
What Does a Water Flosser Actually Do?

Your toothbrush gets the surfaces. A water flosser gets the gaps. That narrow space where two teeth press together, the shallow pocket where gum tissue meets the base of each tooth — a toothbrush misses both of those. They collect plaque and food quietly over time, and that's pretty much where gum disease starts. Water flossers send a pulsed jet right into those two spots.
Not a swap for brushing. Doesn't replace a dental checkup. Think of it as the piece of your routine that actually covers what nothing else does — which, when you put it that way, sounds more useful than 'add-on tool.' If dental work makes standard flossing a hassle, it stops being optional. A wide range of water flosser styles to pick from, depending on how your routine actually runs.
How to Use a Water Flosser Step by Step
Seven steps total. Sounds like a lot written out — in practice, it's about 90 seconds.
Step 1: Warm Water in the Reservoir

Cold water against a sensitive tooth in the morning is an experience you'll have exactly once. Not hot either — just warm, like you'd be fine drinking it. Fill the reservoir to the line, and you're done with step one.
Step 2: Pick a Tip and Click It In
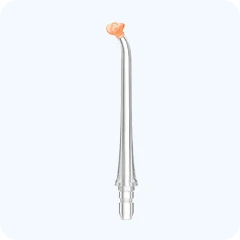
The standard tip that ships with most units is fine for regular daily use—got braces? There's an orthodontic tip specifically made for bracket-and-wire situations. Are gums sensitive right now? Softer tips exist for that, too.
Push whichever one you're using into the handle until it clicks. No click — it's not seated. Push harder until it is.
Step 3: Tip in Mouth, Then Power On

This is the step that catches nearly every first-timer. At least once.
Lean over the sink. Get the tip into your mouth. Then turn the water on. That order, specifically. Switching it on while the tip is still hanging out in the open air is how you end up having to re-explain the bathroom ceiling situation to anyone who walks in.
Step 4: Low Pressure to Start
Start on the lowest setting, especially the first handful of times. It'll feel underwhelming. That's correct — you're learning where to aim, finding the rhythm, building the habit. After a few sessions, when things start to feel natural, nudge the pressure up until you hit a setting that actually does something without making your gums angry.
Step 5: Aim at the Gum Line — Trace, Don't Blast
Aim where tooth meets gum. Pause in the gap between each pair of teeth.
About 90 degrees to the tooth surface is the standard guidance, and it works for most people. Mental model that helps: you're tracing a line around your mouth, not hosing things down—slow and deliberate beats fast every time here.
Step 6: Back Teeth First, Get Both Sides
Start at the very back and work forward along the outer surface. Then loop back and do the inner surfaces too.
Back molars are where most people cut corners. They're also where buildup is worst, probably because those teeth can't see themselves in the mirror. Give them the same attention you'd give the front teeth.
Step 7: Off, Drain, and Leave the Lid Open

Turn the unit off before pulling the tip out. Then empty the remaining water, rinse the tank, and leave the reservoir lid off to air dry.
Sealing a wet tank every day is how you eventually end up with mineral deposits building up inside and a smell that's weirdly hard to track down.
Seven-step quick reference:
|
Step |
Action |
Why It Matters |
|
1 |
Fill with lukewarm water |
Cold water shocks sensitive teeth — warm is far easier |
|
2 |
Choose the right tip and click it in |
Different tips handle different dental situations |
|
3 |
Lean over the sink; tip in the mouth before powering on |
The most common beginner mistake — and the wettest |
|
4 |
Start on the lowest pressure setting |
Let's you learn angles before chasing effectiveness |
|
5 |
Aim at 90° to the gum line; trace tooth by tooth |
Targeting matters — random spraying cleans almost nothing |
|
6 |
Do outer surfaces, then inner surfaces |
Back molars, especially — don't shortcut them |
|
7 |
Off, drain, lid open to dry |
Sealed wet tank = mineral buildup and eventually smell |
Water Flosser Before or After Brushing?
Honest answer? Doesn't matter as much as people make it seem.
Before brushing, clear any debris so the toothbrush and toothpaste have less to fight through. There's some evidence that fluoride penetrates more effectively between teeth after the gaps have been cleared. After brushing, rinse whatever the brush loosened but didn't remove. Both leave you with cleaner teeth.
Pick the order you'll actually maintain every single day. That's the only decision that matters here — not which sequence is technically superior.
Water Flosser or String Floss — Do You Need Both?
String floss wraps around the tooth and physically scrapes. That C-shape contact is really good at lifting sticky plaque from tight spots where teeth press close — water doesn't replicate that grip. Water rinses; it doesn't scrape.

Water flossing reaches into gum pockets, moves around dental hardware without snagging, and is far more accessible for people with arthritis or hand mobility issues. Most dentists recommend both: water flossing daily for overall gum maintenance and string flossing a couple of times a week for tight contact points. A portable dental water flosser makes the daily part easy to keep up with, even away from home.
How they actually compare:
|
Feature |
Water Flosser |
String Floss |
|
Cleans gum pockets |
Excellent |
Moderate |
|
Scrapes tight contact points |
Moderate |
Excellent |
|
Works around braces & implants |
Excellent |
Awkward/prone to snagging |
|
Ease of daily use |
Very easy |
Requires technique |
|
Good for limited hand mobility |
Yes |
Difficult |
|
Typical session time |
1–2 minutes |
1–2 minutes |
|
Best frequency |
Daily |
Daily or a few times/week |
If You Have Braces, Implants, or Crowns
Braces and string floss do not get along well. The floss snags on wires, threads get caught in brackets, and flossing becomes a drawn-out process that most people quietly start skipping. A water flosser goes around it all — no threading required. Use the orthodontic tip if your unit includes one; it genuinely makes a difference.
Implants and crowns — what you're cleaning is the margin, that thin line where the restoration meets your natural gum. That's where bacteria collect, and that's the spot to focus on. Low pressure, slow pass along the edge. Especially careful if the work is recent.
Light bleeding when you're starting isn't unusual — gum tissue often needs a few days to adjust to something new touching it. Still bleeding consistently after a week or two? Don't chalk it up to adjustment. That's a dentist conversation.
Common Mistakes — and Easy Fixes
Most of these fix themselves within a few sessions, but knowing them going in saves some frustration:
|
Mistake |
What Happens |
The Fix |
|
Turning on before the tip is placed |
Water everywhere — mirror, counter, face |
Tip in the mouth first, then power on |
|
Starting at high pressure |
Gum soreness; many quit after day two |
Always start low; work up over a few sessions |
|
Skipping the inner tooth surfaces |
Half the mouth is left uncleaned |
Do the outer surface, then loop back for the inner |
|
Rushing past the back molars |
Heaviest buildup stays untouched |
Slow down there specifically — they need more time |
|
Leaving water in the sealed tank |
Mineral deposits; bad smell for weeks |
Drain, rinse, and let it dry off after every single use |
The two that take the longest to break: cranking the pressure too high too early, and not emptying the tank every time. Both flip quickly once you're paying attention.
How Long Should a Session Take?
Minutes, maybe two. That's a full mouth.
Most reservoirs hold enough water for about 60 to 90 seconds of steady flow — that sizing isn't random. Done in 20 seconds? You rushed past a lot. Refilling the tank halfway through? Way too much time in individual spots.
Once a day is the standard. Evening makes practical sense for most people — clearing the mouth before a long sleep means bacteria have less to feed on overnight. Morning works fine too. Whatever time you'll actually stick to wins.
How to Keep the Device Clean

Every single use: drain the tank, rinse it, remove the tip, and leave the lid open to dry. Thirty seconds. Do it every time without exception.
Once a month — or when pressure drops noticeably, or you catch a smell — run equal parts water and white vinegar through the whole unit. That breaks up mineral deposits inside the internal valves. A 2003 study in the Journal of Water and Health (Jagals et al.) showed sealed moist containers create near-ideal conditions for biofilm formation. Vinegar flush is the simple fix.
Replace tips every three to six months. Bristled specialty tips — orthodontic, plaque seeker — wear out faster than standard ones, so those need changing sooner.

FAQs
What is the correct way to use a water flosser?
Fill with lukewarm water, lean over the sink, and get the tip into your mouth before turning the unit on. Aim at roughly 90 degrees to the gum line and trace tooth by tooth — outer surfaces first, then inner. Turn the unit off before removing the tip. That's the full method.
Why don't dentists recommend water flossers?
Most dentists actually recommend them. Those who hold back are usually worried that patients might use it as an excuse to stop brushing or set the pressure so low that it doesn't accomplish much. For the vast majority of people, though, water flossing is a real step up from not cleaning between teeth at all.
Should I use a water flosser before or after brushing my teeth?
Either order works fine. Before brushing, clear debris so the toothbrush and toothpaste have less to deal with. After brushing, rinse out whatever the brush loosened. Pick whichever fits your routine, don't swap back and forth, and don't overthink it.
Can I use a water flosser if I have crowns?
Yes — and it's actually a pretty good choice for crowns. It cleans along the crown margin without the risk of string floss catching on the restoration edge. Keep pressure low, move slowly along that margin, and you're good.
Why is flossing no longer recommended?
It still is. A 2016 report raised questions about the quality of some flossing research, but dental guidance on cleaning between teeth didn't change. The story got a lot of coverage; the actual recommendation did not go anywhere.
Can a dentist pull all your teeth at once for dentures?
Yes — it's called a full-mouth extraction, and it's done under sedation—usually, the first step before receiving immediate dentures. Your dentist will walk you through specifics before scheduling anything.
Can I eat normally with dentures?
After an adjustment period — which varies from person to person — most people get back to a fairly normal diet. Very hard foods and extremely sticky ones tend to stay on the caution list long-term, but daily eating becomes manageable faster than most people expect going in.
Do gums heal faster with dentures in or out?
Immediate dentures typically stay in for the first 24 hours — they act as a bandage over the extraction sites. After that initial window, taking them out overnight is what actually allows gum tissue to breathe and recover.
Do you get temporary teeth while waiting for dentures?
Yes — that's what immediate dentures are. Made before extractions happen, so there's no gap where you're without teeth during the healing and fabrication period.
References and Resources
Waterpik:How to Use a Water Flosser in 3 Simple Steps — Official step-by-step guide covering the fill, tip placement, and gum-line targeting technique.
WebMD:What Is a Waterpik? — Clinical overview of water flossers, usage tips, tip types, and maintenance guidance.
Abdellatif H, et al. (2021) — PMC / Saudi Dental Journal:Water Flosser vs. String Floss — Plaque Removal Efficacy After Single Use — Randomized controlled trial showing water flosser and string floss achieved equivalent interdental plaque removal; water flosser recommended for patients with limited dexterity or orthodontic appliances.
Mohapatra S, et al. (2023) — PMC / Journal of Indian Society of Periodontology:Comparing the Effectiveness of Water Flosser and Dental Floss in Plaque Reduction — Systematic Review — Systematic review across seven RCTs; majority of studies favored water flossers for plaque reduction, particularly in interproximal areas.
Jagals P, et al. (2003) — PubMed / Journal of Water and Health:Container-Biofilm and Microbiological Water Quality in Enclosed Storage Containers — Research confirming biofilm formation in sealed moist containers; scientific basis for draining and air-drying the water flosser reservoir after every use.
American Dental Association (ADA) / MouthHealthy:Water Flossers and Water Flossing — ADA-backed confirmation that water flossers with the ADA Seal are safe and effective for plaque removal; specifically endorsed for patients with braces, bridges, and implants.
Healthline:Waterpik vs. Flossing — Pros and Cons — Plain-language comparison of water flossing and string flossing, covering technique, clinical evidence, and who benefits most from each approach.
Lyle DM (2012) — PubMed / Compendium of Continuing Education in Dentistry:Relevance of the Water Flosser — 50 Years of Data — Comprehensive review of five decades of clinical evidence on water flosser effectiveness for plaque removal, gingivitis reduction, and gum pocket access.


Looking for something else?

How to Clean a Water Flosser: A Step-by-Step Guide
LEARN MORE
Can You Use an Electric Toothbrush with Braces?
LEARN MORE
Best Inexpensive Electric Toothbrushes in 2026
LEARN MORE
The 5 Best Electric Toothbrushes of 2026: Tested, Ranked, and Reviewed
LEARN MORELooking for something else?

Best Electric Toothbrush for Travel in 2026: Top Picks, Tested and Ranked
LEARN MORE
Electric Toothbrush Not Charging: Complete Guide
LEARN MORE
Electric Toothbrush in Carry-On Complete Travel Guide
LEARN MOREYou may also like
usmile Y20 PRO Upgraded AI Electric Toothbrush
usmile P10 S Electric Toothbrush
usmile Q30 Kids Electric Toothbrush
Further reading

Why Do My Gums Bleed When I Brush My Teeth?

How to Repair Enamel and Prevent Further Damage

Tongue Scraper vs Toothbrush: Which Is Better for Cleaning Your Tongue?