


6 Year Molars Brushing: How to Care for Your Child's New Back Teeth
Here's something nobody really warns you about when you're in the thick of parenting a kindergartener: the first molars show up without a single sign. No wobbling. No countdown. No "the Tooth Fairy's coming" excitement to tip you off. They just quietly push through at the very back of the mouth while your kid's brushing routine is still focused entirely on the front teeth — the ones you can actually see.
That quiet arrival is exactly the problem. By the time most parents realize these teeth are there, they've been erupting for days without any special brushing attention. And here's the part that matters: these aren't baby teeth. They don't fall out and get replaced. Six-year molars are permanent, and whatever brushing habits form around them right now are the ones those teeth will depend on for the next seven decades.
When it comes to building soliddental care routines and habits for your child's long-term oral health, nothing matters more at this age than getting 6-year molars brushing right from day one. The fix isn't complicated — it's mostly knowing where these teeth are, what brushing adjustments to make, and which mistakes to skip. Let's go through all of it.
What Are 6-Year Molars?

First Permanent Back Teeth
Six-year molars — dentists call them first permanent molars — are exactly what the name says: the first permanent teeth your child will ever have. They sit at the very back of the mouth, one in each corner, and they grow into a brand-new space rather than replacing anything. That's the part that catches most parents off guard. No baby tooth loosens first. No obvious signal that something's happening back there.
Why They're So Easy to Miss
Think about how front teeth usually go. Something wobbles for weeks, the child's fascinated by it, and the Tooth Fairy gets involved. That whole sequence is a heads-up. Six-year molars skip all of that. They simply appear at the far back of the mouth, behind the existing teeth, while the daily brushing routine keeps doing what it's always done — covering the visible front teeth and calling it done. This is the most consistent brushing gap dentists see in six-year-olds, and it's completely understandable given the timing.
Why These Teeth Actually Matter
These molars do a lot of structural work. They shape the lower face, anchor the adult bite, and guide where every other permanent tooth positions itself as it comes in. They carry the heaviest chewing load of any teeth in the mouth. Taking care of 6-year molars right from the start isn't just about that specific tooth — it's about setting up the entire adult smile.
When Do 6-Year Molars Come In?
The Typical Timeline
Despite the name, these first permanent molars can appear between ages 5 and 7. Some kids get them right around their sixth birthday. Others are closer to 7. A 5-year-old with raised gums at the back of the mouth isn't unusual, which is exactly why 6-year molars brushing should start the moment you spot them coming in. About 80% of eruption timing comes down to genetics — so if you remember your own dental development being early or late, your child's probably headed in the same direction.
Early or Late Is Usually Fine
A molar arriving at age 5 is not an emergency. Neither has shown up at age 7. Both sit within the normal developmental window. If you're genuinely unsure whether what you're seeing at the back of your child's mouth is a new molar or something else, a single appointment can clear that up fast.
What to Look For When They're Coming In
The gum where the molar is pushing through often looks a little raised and whitish, almost like a dome with a tooth trying to break through the middle. Some kids feel pressure or fullness at the back of the jaw. Most people feel soreness when biting down on something hard. That's the first sign. Knowing what to look for makes it easier to spot — and easier to update the brushing routine at the right moment.
Why Brushing 6-Year Molars Needs Extra Attention
Molars Have Deep Grooves That Trap Everything
Run your tongue across your own back molars and feel those ridges and valleys. That's what's meant by pits and grooves — and they collect food and plaque in a way that flatter tooth surfaces simply don't. A toothbrush actually has to press into those grooves to clean them. A quick, light swipe across the top leaves most of the debris untouched.
Kids Don't Naturally Reach the Back
Six-year-olds brush what they can see. That's the front teeth, maybe the adjacent ones, and not much else. The back molars are out of sight and physically harder to reach with a child's brushing motion. This isn't laziness or defiance — it's just that age-appropriate brushing doesn't extend far enough back without specific guidance.
These Are Permanent — There's No Second Chance
A cavity in a baby tooth is a problem. A cavity in a 6-year molar is a much more serious one, because this tooth isn't being replaced. If it's lost to decay, it's gone. A cavity that goes unnoticed in a six-year molar at age seven can lead to a root canal by age twelve if it's not caught and treated early. That's the stakes.
Decay Starts Faster Than You'd Expect
When a molar is only partially erupted — just starting to break through — there's gum tissue still covering part of the tooth. That overlap creates a pocket where food sits, and bacteria multiply. Cavities can develop in permanent molars within months of eruption if the brushing routine isn't reaching that far back consistently.
How to Brush 6-Year Molars Properly
This is the practical section. Every tip below comes from a specific gap that shows up repeatedly in how most kids brush at this age.
Get the Right Brush for the Job

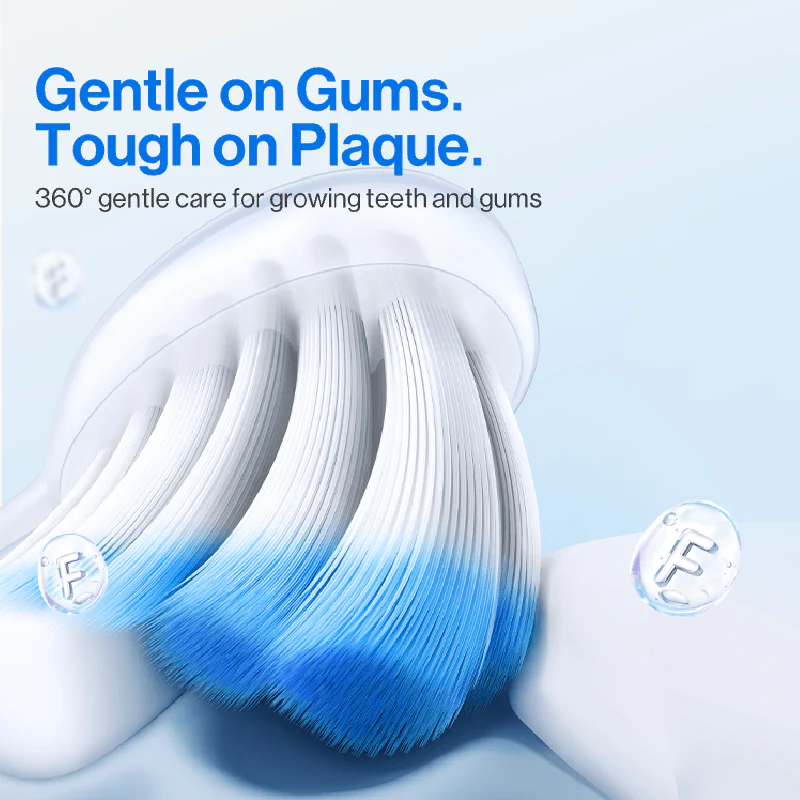
A small-headed, soft-bristled toothbrush is non-negotiable here. A large brush head physically cannot reach the back of a six-year-old's mouth without forcing their jaw open wide,which makes the whole thing uncomfortable. That discomfort guarantees they'll resist. For parents who want something that does more of the heavy lifting, a kids' electric toothbrush with a small rotating head cleans back surfaces more consistently than a manual brush — especially in the hands of a child whose technique is still developing. The bristle motion reaches into the grooves even when placement isn't perfect.
Pea-Sized Toothpaste — That's the Whole Amount
A pea-sized dot of fluoride toothpaste. Not a stripe across the whole brush. More toothpaste creates more foam, makes rinsing more difficult, and results in more toothpaste being swallowed. Keep it small. Make sure it actually makes it onto the bristles rather than getting smeared onto a dry brush and flicked straight into the mouth.
Twice a Day, Every Day — Including Bedtime
Morning brushing removes overnight bacterial buildup from a long stretch of low saliva production. Bedtime brushing removes everything from the whole day — and is the more important of the two, because there's no eating afterward, and whatever's left on the teeth stays there for 8 hours with minimal protective saliva flow. Both sessions have to reach the new molars at the back.
Two Full Minutes — Not a Rough Approximation

Studies show that brushing for two minutes removes 26% more plaque than brushing for 45 seconds. Most kids, without supervision or a timer, brush for about 45 seconds. A timer helps. So does a toothbrush designed for little mouths with a built-in pacing signal — when the brush tells them when to switch to the next section of the mouth, children naturally brush longer and cover areas they'd otherwise skip. It turns a vague instruction into a concrete, guided routine.
Go One Space Farther Back Than You Think
Here's the most practically useful tip in this whole article. Teach your child to go one space behind the last baby tooth. That's exactly where the new molar sits. 'Brush all your teeth' is too abstract for a six-year-old to translate into a physical behavior. 'Go past the last baby tooth and brush one more space back' gives them a specific place to aim for. Once they know where the molar is, they start reaching it.
Clean the Chewing Surfaces Deliberately
Short back-and-forth strokes on the top surfaces of the back teeth, pressing gently into the grooves rather than skimming across them. It doesn't take long — five or six deliberate strokes per molar. But those strokes have to be intentional. A brush quickly dragged across the top without any real contact leaves the grooves untouched.
Check After They Brush — Every Time
Let your child brush first. Then look. Tilt their head back slightly, use a flashlight if it helps, and actually look at the back teeth. See what didn't get cleaned. Add a few strokes yourself, framing it as finishing together rather than correcting something they did wrong. Kids at this age genuinely can't see what they're missing — and they can't feel the difference between a properly cleaned molar and one that wasn't reached at all.
Should Parents Still Help a 6-Year-Old Brush?
Honestly? Yes — especially for the back teeth. Most dental professionals put independent brushing ability at around age 8. At six, the fine motor control, the sustained attention, and the awareness of which surfaces need coverage simply aren't fully there yet. Wanting to brush independently and being able to brush thoroughly are not the same thing, and confusing them is one of the more common mistakes parents make at this stage.
The 'Brush First, Parent Checks' Method
This one works well in practice: the child brushes for the full two minutes, doing everything themselves, then the parent checks and finishes the back teeth. The child gets the independence they want. The molars get the coverage they need. Both things happen at once.
Staying in the Room Makes a Difference
Children brush longer when someone's watching. Not because they're performing — just because another person's presence slows the rush. Simply being in the bathroom while your child brushes adds roughly a minute to the average session. That minute is usually exactly where the back teeth get covered.
Build the Routine, Not Just the Reminder
Same time, same order, every single day. Morning and before bed. Consistency is what builds long-term habit — not nagging, not reward charts, not consequences. Predictable routines become automatic faster than anything else. When brushing happens at the same time every day, it eventually stops being something you manage and becomes something your child just does.
Flossing and 6-Year Molars
Start When Any Two Teeth Touch
Once any two teeth make contact, a toothbrush cannot clean the shared surface. The bristles simply can't fit. This isn't a technique issue — it's geometry. Flossing becomes necessary the moment any two teeth are touching, whether it's the new molars or the baby teeth still in the mouth.
Back Teeth Need a Parent to Floss Them

Kids can't reliably floss their own back teeth at age 6. Floss picks are the most practical tool here — far easier to maneuver in a small mouth than traditional string floss. Parent-assisted flossing for the back teeth, about a minute before bedtime brushing, keeps those contact zones clean and adds very little to the routine.
Most Childhood Cavities Form Between Teeth
The most common location for cavities in the back teeth is between them — exactly where a toothbrush can't reach. Flossing is the only thing that cleans those surfaces. Building the habit early means fewer surprises at dental checkups. That's the whole math.
What to Expect When 6-Year Molars Come In
Every child goes through this differently. Some barely notice. Others have a genuinely rough week. Knowing the normal range means you're not caught off guard either way.
Common Symptoms
Sore or puffy gums at the back of the mouth. Mild jaw aching. Irritability at mealtimes, especially with crunchy or chewy foods. Temperature sensitivity when eating or drinking. The occasional low-grade fever. Some kids also get headaches — the jaw and head share a lot of nerve territory, and pressure from molars can radiate.
Eating Gets Uncomfortable for a Bit
Hard foods on gums that are actively breaking through are an unpleasant combination. Soft foods — yogurt, smoothies, warm soup, mashed things — get most families through the eruption window without every meal becoming a negotiation. This usually only lasts one to two weeks per molar.
Normal Discomfort Should Improve on Its Own
Mild soreness during active eruption is completely expected and should settle within a week or two once the tooth has fully broken through the gum surface. If the pain is getting worse rather than better, you see pus around the gum, there's noticeable facial swelling, your child has trouble swallowing, or the fever goes above 38.5°C / 101.3°F — call the dentist. Those aren't signs of normal eruption. They're signs of an infection.
Easing 6-Year Molar Pain at Home
Keep Brushing the Area — Even Gently
Avoiding a sore area may feel intuitive, but it can make the situation worse. Food trapped around a partially erupted molar is exactly what causes infection. Gentle brushing with light pressure — not scrubbing, just soft contact — keeps the area clear and actually reduces inflammation over time. The brief discomfort of brushing a sore area is far less than what happens when bacteria get the time and space to set in.
Cold and Soft Foods Help More Than You'd Think
Cool temperatures numb gum soreness temporarily. Soft textures eliminate chewing pressure on something that's already tender. Yogurt, chilled fruit, a smoothie, a homemade fruit popsicle — these are genuinely useful during the eruption window, not just comfort food. Kids are often more willing to eat soft foods at this stage than to resist them.
Gum Massage — Worth Trying

A clean finger rubbed gently over the sore gum tissue can help temporarily. Some kids find it relieving. Others find it annoying. There's no downside to offering it once — if they hate it, you know quickly.
Medication — Ask First, Always
Ibuprofen or acetaminophen can genuinely help if the discomfort is disrupting sleep or meals. But get the right dosage from your child's dentist or pediatrician, based on actual weight — not from an internet chart and not from what worked for a sibling of a different size. Never use aspirin in children.
Dental Sealants for 6-Year Molars
What Sealants Are
Sealants are thin protective coatings painted onto the chewing surfaces of permanent molars. They fill in those deep pits and grooves — the same grooves that trap plaque and make molars so cavity-prone — creating a smoother surface that's considerably easier to keep clean—a quick procedure. No drilling. No significant discomfort.
The Numbers Behind Them
The CDC says dental sealants can prevent up to 80% of cavities in the back teeth. The American Academy of Pediatric Dentistry considers them standard preventive care for permanent molars. For a tooth that needs to last 70 or more years, that level of protection is worth asking about.
When to Ask About Sealants
Once the molar has erupted enough for the dentist to work with it — typically visible at a routine checkup — it becomes a candidate for a sealant. Most dentists bring it up themselves at the right time. But if they don't, 'Are the molars ready for sealants?' is a completely appropriate question to raise.
Sealants Are a Layer of Protection, Not a Replacement for Brushing
The coating covers only the chewing surface. The sides of the tooth, the gum line, and the spaces between teeth still rely entirely on brushing and daily flossing with 6-year molars. Sealants add a layer of defense — they don't replace the routine.
How to Avoid Cavities in Kids
Brushing the new molars is the foundation, but cavity prevention is a whole system.For a solid overview of6-year molars brushing best practices and guidance on fluoride toothpaste, the ADA's MouthHealthy resource for kids is worth bookmarking. Here's the complete prevention routine:
Brush Twice a Day with Fluoride Toothpaste
Fluoride strengthens enamel and neutralizes the acid that cavity-causing bacteria produce after every meal. Twice daily, a pea-sized amount covering all surfaces, including the back molars — that's the baseline; everything else builds on it.
Limit Sugar Between Meals, Not Just at Meals
Every exposure to sugar triggers an acid response that lasts about 20 minutes. A child who grazes on crackers, granola bars, or fruit pouches throughout the day is giving bacteria a near-continuous fuel supply. Meals are fine. Constant snacking is the problem. Even foods that don't seem obviously sugary — many "healthy" kids' snacks — contain more sugar than people realize.
Make Water the Default Drink

Juice, flavored milk, sports drinks — they all contain sugars that feed cavity-causing bacteria. Water doesn't. Offering water as the everyday, all-day drink — and reserving sweetened drinks for mealtimes — is one of the simpler changes that has a meaningful impact on cavity risk over time.
Keep Regular Dental Visits
Every six months for most children. The years between ages 6 and 12 are when permanent teeth are erupting and most vulnerable to early decay. Routine checkups catch problems before they compound, confirm sealant timing, and monitor bite and jaw development. These visits are not optional care — they're part of the system.
Replace Toothbrushes Before They're Noticeably Wrecked

Every 3 to 4 months, or after illness. Frayed bristles can't clean molar grooves regardless of technique. Keeping a replacement ergonomic brush head on hand means there's no reason to delay swapping it out — worn bristles lose contact with groove surfaces, which is exactly where these teeth are most vulnerable.
6-Year Molars, Baby Teeth, and Adult Teeth: What Parents Should Know
Baby Teeth Still Matter Right Now
Six-year-old dental development is a mix — some baby teeth still in, some permanent teeth arriving. Dentists call this mixed dentition. The baby teeth that are still there aren't just waiting to fall out. They're actively holding jaw space for the permanent teeth coming in behind them. A baby tooth lost to decay before it's naturally ready to fall out can cause the surrounding teeth to drift, creating crowding problems that are much more expensive and complicated to address later.
Permanent Teeth Look Bigger and Slightly More Yellow — That's Normal
First-time parents often panic when they see how large the new permanent incisors look next to the remaining baby teeth. They're not too big — the face simply hasn't grown to match them yet. The slight yellow tint is also normal and not a hygiene issue. Adult teeth have more visible dentin (which is naturally yellower) than baby teeth, whose enamel is thinner and appears whiter. It's anatomy, not staining.
Loose Baby Teeth Need Gentle Brushing Too
A wobbly tooth is uncomfortable to brush around, but leaving it alone creates a bacteria trap at the gum line. Gentle brushing around the base of a loose tooth — not sawing at it — keeps the surrounding tissue healthy and makes the eventual loss less likely to cause swollen or inflamed gums.
Two Rows of Teeth Sometimes Need a Dental Check
Occasionally, a permanent tooth starts coming in before the baby tooth has fallen out, creating a brief double row. Most of the time, the baby tooth loosens and falls out on its own within a few weeks. If it's been there for more than that with no sign of movement, a quick dental check will determine whether it needs to come out.
Orthodontic Timing: Is 7 Years Old Too Early for Braces?
Age 7 Is for Evaluation — Not Treatment
The American Association of Orthodontists recommends a first orthodontic check around age 7. Not because 7-year-olds routinely get braces — they don't — but because the presence of the first permanent molars gives an orthodontist enough information about jaw development and bite formation to identify issues that are easier to correct early than later. Most kids seen at this age go home with a plan to check in annually. Nothing more.
First Molars Help Dentists Evaluate the Bite
The way the upper and lower first molars come together tells a trained eye a lot about how the adult bite is forming. Crowding, overbite, crossbite — these patterns often show up in early molar positioning before they become obvious in the front teeth. Catching them here means more options for intervention.
Early Evaluation Doesn't Mean Early Treatment
Most children evaluated at 7 don't need anything done yet. Real orthodontic treatment — braces, expanders, whatever's appropriate — typically starts between 9 and 14, depending on the specific situation. The early evaluation is about timing, not urgency.
Common Mistakes Parents Make With 6-Year Molars

Treating Them Like Baby Teeth
This is the most consequential mistake, hands down. 6-year molars are permanent teeth. If they're lost to decay, they don't grow back. Parents who approach them with a "it'll fall out eventually" mentality make brushing decisions accordingly — and the results show up years later at much higher cost.
Stopping Brushing at the Last Visible Baby Tooth
The new molar sits one space further back than the existing brushing routine reaches. Without a specific adjustment — a deliberate instruction to go further back — that tooth doesn't get touched during brushing, potentially for months.
Handing Over Full Independence Too Early
Age 6 wants independence. At age 8,one can usually execute it reliably. The two years in between are the ones that matter most for molar care, and they're the ones most likely to get skipped over in the push toward self-sufficiency.
Skipping Flossing When Back Teeth Come Close Together
Once teeth touch, the toothbrush can't clean the contact surfaces between them. Building the flossing habit before cavities form between the molars is dramatically easier than trying to introduce it after a filling has been placed.
Waiting Too Long With Worrying Symptoms
A day or two of mild soreness: normal eruption. Five days of worsening pain with visible swelling and a recurring fever: call a dentist. These are not the same situation, and treating them the same way leaves the infection to worsen.
FAQs
How many times a day should a 6-year-old brush their teeth?
Twice a day — morning and before bed. Bedtime is the one that matters more, since bacteria work on whatever's left on the teeth all night while saliva production drops. Two full minutes each session, pea-sized fluoride toothpaste, and parents should still be checking (and usually finishing) the back molars until around age 8.
What is the 3-3-3 rule for a toothache?
The 3-3-3 rule isn't a standardized clinical guideline — you'll see it used differently across different websites. For kids and dental pain, keep it simple: mild soreness during active molar eruption is normal and typically settles within a week or two. If the pain is getting worse instead of better, comes with fever, pus, or significant swelling, don't wait — that's a dentist call rather than something to track with a rule.
What should I expect with 6-year molars?
New permanent molars appear at the very back of the mouth, behind all the baby teeth, and may cause soreness, swollen gums, mild irritability around mealtimes, and brief temperature sensitivity. Most kids move through the eruption window within a week or two. The bigger practical adjustment is updating the brushing routine to deliberately reach the new teeth, which sit further back than the existing routine was covering.
Is 7 years old too early for braces?
Too early for braces in most cases, but the right age for a first orthodontic evaluation. The American Association of Orthodontists recommends the initial check around age 7 because the first permanent molars are sufficiently developed to assess the bite and jaw development. Most kids evaluated at 7 are simply monitored. Actual treatment, when it happens, usually starts between 9 and 14.
Is it okay to not brush toddler teeth?
No. Baby teeth get cavities exactly like adult teeth do, and cavities in baby teeth can damage the permanent teeth developing underneath them. They also hold the jaw space that incoming permanent teeth depend on. Brushing starts at the first tooth — a rice-grain-sized amount of fluoride toothpaste for under-3s, pea-sized from age 3 onward.
How do you avoid cavities in kids?
Brush twice daily with fluoride toothpaste, floss any teeth that touch, limit sugary snacks and drinks to mealtimes rather than all day, offer water as the everyday drink, ask the dentist about sealants once the permanent molars have erupted, and keep the 6-month dental visits. Each piece covers a different cavity risk factor. Skip any one of them, and the others can't fully compensate.
What is the rule of 7 in pediatric dentistry?
In orthodontic terms, the rule of 7 refers to the recommendation that children have their first orthodontic evaluation by age 7. The reason: first permanent molars are usually present by then, giving a dentist or orthodontist meaningful data about how the jaw is growing and whether any issues would benefit from early attention. Most children seen at this appointment don't need any treatment yet — it's primarily a baseline check with the option to act if the timing is right.
|
Quick version:
|
Sources
- American Dental Association / MouthHealthy: Healthy Habits for Babies and Kids — Fluoride toothpaste amounts, twice-daily brushing, and parent supervision guidelines.
- CDC — Oral Health: Dental Sealant Facts — Data on sealants preventing up to 80% of cavities in back teeth.
- American Academy of Pediatric Dentistry: Pit-and-Fissure Sealants Guideline — Clinical recommendation for sealants on permanent molars as standard preventive care.
- Columbia University Irving Medical Center: Yes, You Do Brush Baby Teeth — Baby tooth importance, 6-year molar transition, and orthodontic evaluation at age 6–7.
- Healthline: 6-year molars brushing guide — Eruption symptoms, pain management, smoothie recipe, and comprehensive FAQ overview.
- American Association of Orthodontists: Why See an Orthodontist by Age 7 — Rationale for early orthodontic evaluation and first molar bite assessment.
- NHS: How to Keep Your Teeth Clean — Brushing technique, fluoride guidance, and children's dental care standards.
- Raising Children Network: Dental Care for Children — Brushing technique, flossing when teeth touch, toothbrush choice, and checkup frequency.


Looking for something else?

Electric Toothbrush Vibrating vs Rotating: Which One Should You Actually Choose?
LEARN MORE
Electric Toothbrush Round Head vs Oblong: Which Shape Actually Works Better?
LEARN MORE
Stop Making a Mess — Here's Exactly How to Use a Water Flosser the Right Way
LEARN MORE
How to Use an Electric Toothbrush: A Step-by-Step Guide
LEARN MORELooking for something else?

How Often Should You Change Your Electric Toothbrush Head?
LEARN MORE
How to Clean a Water Flosser: A Step-by-Step Guide
LEARN MORE
Can You Use an Electric Toothbrush with Braces?
LEARN MOREYou may also like
usmile Q30 Kids Electric Toothbrush


Further reading

What Do Gum Pockets Look Like? Signs, Depths, and Treatment Options

How to Improve Gum Health Quickly: 9 Easy Daily Tips
Best Electric Toothbrushing Technique: How to Brush Correctly for Healthier Gums